I Said I Wouldn't Do This!

Ok, I was talked into creating a blog to showcase my creativity. I have been resisting this for far too long, but now is the time to finally get the ball rolling.

So here goes. Come with me on my journey into creativity.

Friday, December 10, 2010

12 Tags of Christmas - Day 10

Frosty the Snowman... was a ........ ok... you get the gist.
Todays tag is quite cute and would make a good tag to put on a child's present... but I'm not.  LOL! These are all for me.  I will use them on a tree stand to display them for everyone to see.

So again, I don't have some of the elements... but I'm not going to let that stop me.  Take a look at Tim's day 10 tag.  It's really cute.  He's come up with some of the neatest dies.  But alas, my cricut to the rescue.  I found a culte little snowman on my Joys of the Season cricut cartridge and used it instead.  I cut it out using grungepaper.  I stamped the Sentiment and then took it a bit further by embossing it with some UTEE so it would stand out more.

And here's day 10's tag:

Here's the top of the tag.  I like the embossing acrylic on top.


And I embossed the sentiment so it would stand out.  I went back and used Black stickles on the broom making it look more like a lamppost.

Recipe:
Shipping tag
Joys of the Season Cricut cartridge
Tulle and Ribbon from stash
Black Stickles
Acrylic sheet
Sizzix Snowflakes Embossing folder
UTEE
Tim Holtz brads
Tim Holtz Grungepaper
Acrylic Paint Dabber - Snow Cap
Distress Inks:
Faded Jeans
Stormy Sky
Walnut Stain
Black Soot

Thursday, December 9, 2010

12 Tags of Christmas - Day 9

Doncha just love it when things go a lot better than you planned them to?  Well, after staying up til way after midnite working on my Day 8 tag that was trying to get the best of me, I got it done and was in bed at an unreasonable time.  Then I was back up less than 4 hrs later to cook a peach cobbler.   So lemme tell ya... things were smelling some kinda good when I went to check on it and realized that I had used the regular flour vs the self rising flour.  Yep... that make a big difference.

So I digress... lets get back to day 9 tag.  Tim Holtz decided to take it easy on us by giving us a simpler tag to do.  Its only simple if you have all of his supplies... which he has at his fingertips.... including that adorable Vagabond .  So he also used this new die of his ... .to make rosette's.  No, I don't have that either.  I can't emphasize enough to anyone that wants to give me some Tim Holtz supplies some of the items on my wish list.  Hint, Hint, Hint!  LOL!

First off, I decided to make my own paper..... pulled out a sheet of craft cardstock.  I stamped the entire paper with my musical notes stamp with archival ink.  I heated it to make sure that it would not rub or smear when I started manipulating the paper.  So then, I pulled out my Scor-Pal and went to work.  I cut the first one and had it all assembled to realize that that was one huge rosette.  Ok..... so I miscalculated.  This time I cut the strip 3/4" x 12" and then used the Scor-pal to score this strip in 1/2" increments. I cut off 1/4" from one end and turned the paper over, then scored the opposite side at the 1/2" marks again or in between the original score marks.... making each score mark 1/4" in width.  I cut 2 circles out with my paper hole punch... but ended up free hand cutting them down to the size to fit the rosette.  If you don't understand any of this... take a look at this Rosette Tutorial.

I pretty much used what I had on hand for this tag and made substitutions as necessary.  Again.... my cricut to the rescue.  I used the Blackletter Cricut Cartridge for the sentiment on the tag.  I use my Glimmer Mist vs the Perfect Pearls.  I had the clear hearts in my stash from my jewelry making days.  Unfortunately, I gave most of my sewing supplies away .. including buttons.  Yep, I know... but I wan't scrapbooking then and knew that I could use them for this craft.

So without further ado, here is my Day 9 tag:


Closeup of the Rosette

Closeup of the bottom of the tag

Recipe:
Shipping Tag
Blackletter Cricut Cartridge
Ribbon and Fun Fur from stash
Coredinations Cardstock
Musical Notes Rubber Stamp
Archival Ink - Black
Tattered Angels Glimmer Mist - Walnut Gold
Tim Holtz Trinket Pins , Adornments and Brads
Glossy Accents Paper Glaze
Distress Inks:
Wild Honey
Walnut Stain
Tea Dyed

Wednesday, December 8, 2010

12 Tags of Christmas - Day 8

I am oh so struggling to come up with something tonite so I can complete this tag.  I have cut out so many masks and I'm not having any luck with something that I'm finding acceptable.


Whoa is me!

Ok.... over 2 hrs later..... I have finally come up with a tag that I am almost happy with.  Thank you Tim Holtz for the challenge.  Boy, I really wish that I had all the embellishments , rubber stamps, ink pads , ok... lets just say the whole darn line of what he has come up with.... including the new Vagabond embossing machine that he has created.  But since its not in my budget anytime soon, I will just oogle and google and gloat over it.  Take a look at Tag 8 that he created.

So here's what I did with my tag.  I made my own mask using my cricut machine.  I used the Christmas Cards Cricut Cartridge and cut out the couple in the sleigh pulled by the horse.  I then inked up my tag using the Fired Brick Distress ink pad.  After getting it to a color I was happy with, I then used some black archival ink and stamped with the musical note rubber stamp and some snowflakes.  I removed the mask and then following Tim's instructions, I heated the  tag so that the inks were nice and dry.  Then I covered that image up with the other part of the mask and inked with the other distress inks that were shown in the instructions.

I don't have the metal corners.  I was going to make my own, but decided not to do so in the end.  Now what to do about the house?  I don't have that die.  Ah... my cricut to the rescue.  LOL!  Theres gotta be a house on one of the many carts that I own.   Presto... I found one on the Jubilee Cricut Cartridge.  The "village" had no windows but the words "Merry Christmas " on it.  Since I was cutting it a bit on the small side, I hid contoured the words and the really small windows.  I cut this out with grungepaper x2 and glued them together.  EK success has this neat little punch that punches out a tab... so I used that to cut out windows on the village houses.  How neat is that!  Then I painted it with one of the dabbers that I have on hand.

Everything came together quite nicely and I like what I've created now that I've written this all out.  I just realized that I didn't add one of the final touches to this tag... the key.  I'll do that later on.  Enjoy!
So here's the tag:


I like the effect seen around the sleigh (white border) .

Isn't my little Village House the cutest!!

Recipe:
Shipping Tag
Jubilee Cricut Cartridge - Village
Christmas Cards Cricut Cartridge - Horse Drawn Sleigh
Ribbon from stash
Crystal Stickles
Copper Wire
Music Notes Rubber Stamp
Snowflakes - Tim Holtz holiday mini stamps
Hand written sentiment
Tim Holtz Time Piece
Acrylic Paint Dabber - Pool
Distress Inks:
Fired Brick
Tumbled Glass
Chipped Sapphire
Walnut Stain

Tuesday, December 7, 2010

12 Tags of Christmas - Day 7

We're winding down to the homestretch.  Today is day 7 of the 12 Tags of Christmas .... following along with Tim Holtz.  I'm so proud of myself in able to keep this up.  Nothing else is getting done.... lol.... but at least I know that I will have accomplished this task at hand.  I am learning all sorts of new techniques that I've never tried out before.  You really need to go to his blog and see the tags that he is creating.  So go here.... Tim Holtz.

So today's tag used a lot of different techniques, and again, I'm without a lot of the items that he used.  Now if someone would like to gift me with any Tim Holtz supplies.... I would graciously accept them.  He  cut flowers and leaves using sticky backed canvas ..... now where can I find some of that locally.  I had an appointment to take my mom to, so on the way home we have to pass Michael's... so  I stopped in there very quickly.  They didn't have that, but what I found was some Canvas paper by Strathmore and thought I could see about making this work as an alternative.  The other thing that I didn't have is the wood grain folder that Tim used to emboss the tag with.  But have no fear, I used another one..... "Rays".  I should have taken a picture of the tag before I embellished it, but oh well.... I'll have to remember to do that next time.

I'm still in search of the Rock Candy Distress Stickles.  It's on my wish list.
Again, I used my cricut to cut out different elements that I needed for this tag.  This time, I used the font from Hannah Montana cartridge, and the flowers were cut from Accent Essentials.

So without further ado once again, here's my day 7 tag.


Closeup of Bottom of tag.

Closup of flower to show a bit more detail.

Recipe:
Cricut Cartridge - Flower and Leaves
Hannah Montana Cricut Cartridge - Joyful
Shipping Tag
Ribbon from stash
Button from Joanns
Rhinestones
Crystal Stickles
Glimmer Mist - Meadow Green,  Burnt Red, Cherub Pink
Tim Holtz Embossing Folder - Rays
Tim Holtz Grunge Paper
Distress Inks:
Walnut Stain
Vintage Photo
Forest Moss
Fired Brick
Crushed Olive
Frayed Burlap
Alcohol Ink - Cranberry

Monday, December 6, 2010

12 Tags of Christmas - Day 6

Ok... Tim Holtz  is really pushing things here.  Out of all of the elements that he put on todays tag, I had 2 of the items.  Nope, I didn't go out and buy anything.  I used what was in my stash and I think I did a pretty good job of it.

I pulled out my cricut once again and let it work its magic.  I recut the deer that I used in the missing holiday tags that I made.  I also cut a tree from the Cricut Cartridge - Camp Out, out of grunge paper.  I took this cut out and embossed my tag since I didn't have the embossing folder that Tim used.  I don't have any of the pine stuff to make a wreath, so I used some ric-rak .  The tissue tape was replace with some fabric leaf ribbon that I picked up from my LSS (local scrapbook store).

So here's my Day 6 tag:


Close up of bottom of tag.

Recipe:
Cricut Cartridge - Camp Out (Tree embossing)
Cricut Cartridge - Very Merry Tags ( Deer)
Ribbon, Ric-Rak
Shipping Tag
Tim Holtz Grunge Paper and Grungeboard
Tim Holtz Ideaology Word Sticks
Distress Inks:
Walnut Stain
Vintage Photo
Forest Moss
Frayed Burlap
Tumbled Glass
Paint Dabber - Pool
Journaling Tickets
Studio G stamp - Seasons Greetings
Stampology Clear Stamp - Flourish

Sunday, December 5, 2010

12 Tags of Christmas - Day 5

Wow!  I don't know how he comes up with some of these ideas, but he sure is pushing me to my limits.  There are details that Tim Holtz is doing that I had no idea you could do.  I guess it helps if you just think outside the box.

Well, I didn't have a lot of the elements that he used, but again, I used what I have and I think my tag came out just as nice.  I didn't have any metal numbers, so I cut my numbers out of grungepaper ... painted and embossed them.  I don't have any of his dies yet... so my cricut comes in handy for finding similar accent pieces.  I used Blackletter for the numbers and Lacy Labels for the scallop tag.

Here's the final outcome of the tag:

 Close up of Santa!

Close up of bottom of tag embossing.

Recipe:
Blackletter Cricut Cartridge - numbers
Lacy Labels Cricut Lite Cartridge - tag
Tim Holtz Foliage
Tim Holtz Grungepaper
Tim Holtz Christmas Mini Stamps - Santa
Distress Stickles - Fired Brick
Glitz Stickles - Green
Paint Dabber - Snow Cap, Lettuce
Rock Candy Distress Paint
UTEE
Distress Inks:
Fired Brick
Barn Door
Vintage Photo
Distress Embossing Powder:
Fired Brick
Peeled Paint

Saturday, December 4, 2010

I AM QUITE BUMMED OUT!!

I love doing swaps whenever I think I'll be able to do a good job and meet the deadlines.  Last month, I participated in an over the top holidiay tag swap... you can see it here.  Because of Thanksgiving week, I got busy and didn't get to the Post Office to mail it on the day that I was going to and they didn't get out until the Saturday following Thanksgiving.  I handed my package over to the PO Clerk and everything went well.

As of today, my tags have not arrived at their destination!  It's been 8 days and it shouldn't have taken that long for them to reach the hostess.  I could just sit here and cry my eyes out.... but instead... I am cutting out 14 more deer to use on some new tags.

12 Tags of Christmas - Day 4

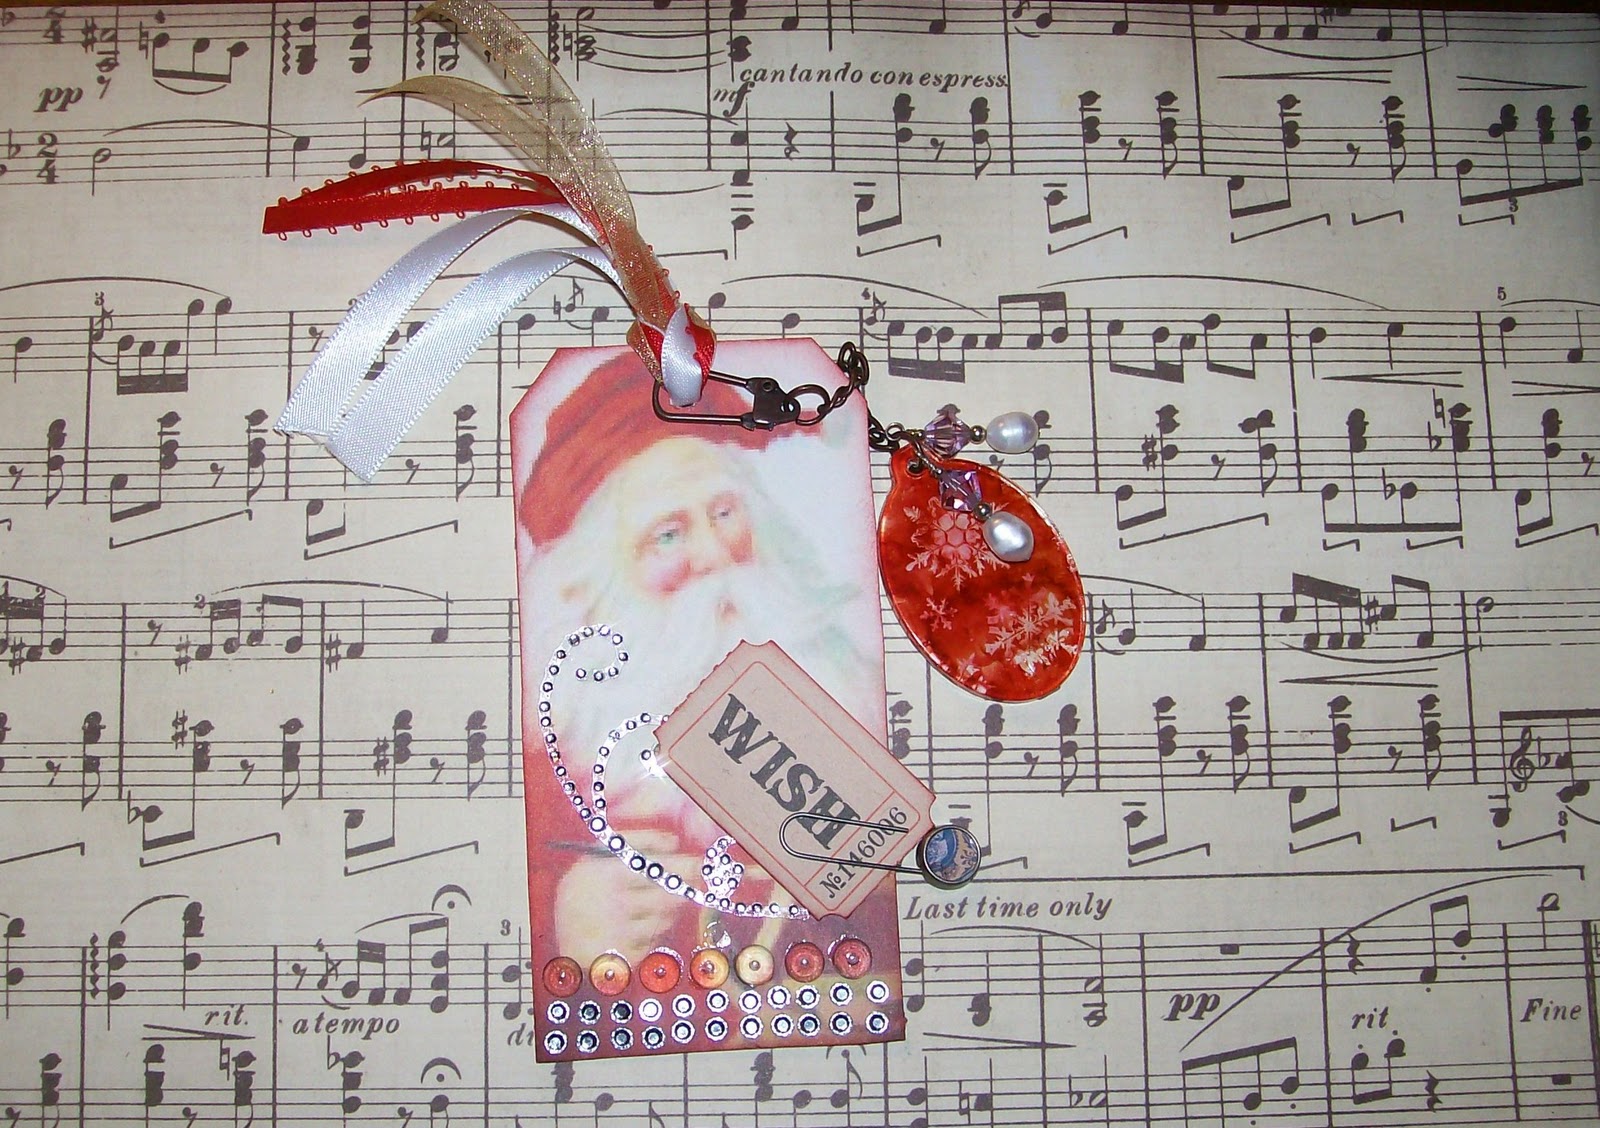
Its Day Four.  And I'm still running with the show. I gotta say, I am having a fun time and loving making these tags.  I actually started working on it about 1:30 am since I was still wide awake.  He is really pushing me beyond my limits.  I'm going thru my stash and making things works.  He used some faceted fragments and I don't have any of them, so I used the regular ones.  I even dug into my jewelry beads and found a few things to add that I thought would look cute.

This tag used a vintage Santa.  So I scoured the net for free vintage images and came across this site... Hub Pages .  I found all kinds of neat things on there.

So here is my day 4 tag:


Here's the Tag......


Close up of the fragment.  I finally figured out how to get it done.  It's not perfect like Tim's, but its good for a first time at trying something like this.

Recipe:
Vintage Santa from HubPages
Ribbon
Rhinestones
Tim Holtz Fragments, Swivel chain
Tim Holtz Adage Tickets
Tim Holtz Mini Holidays Stamp Collection
Distress inks: Fire Brick Red
Andirondak Alcohol Inks:
Cranberry
Rust

Friday, December 3, 2010

12 Tags of Christmas - Day 3

Ok, third times a charm.  This is my third attempt at making this post for my Day 3 tag.  I kept hitting something and wiping out everything that I just written.  That just sucks big time.  Not going to do that anymore.

My goal is to get each days tag done on that day and have it posted to my blog by midnite before Tim Holtz posts the next days tag.  I'm having so much fun doing this.  Now, I could go broke trying to buy every single element that he has used in the creating of his tags..... ok, I am broke since I'm still unemployed... but who's counting the days.  But it would be great to be able to just go and shop at his store and buy every single thing he has designed... including that new "Vagabond" embosser.  If you've not had a chance to see todays creation from Tim, then go here to view Day 3.

So, without further ado, here is my Day 3 tag:


The Day 3 Tag

Closeup of the Bird

Closeup of the bottom of the Tag

Recipe:
Home Decor Cricut Cartridge - Bird
Hero Arts Tree Stamp
Inkadinkadoo Script Stamp
Star Dust Distress Stickles
Ribbon, Fun Fur and Ribbon Flower
Andironak Paint Dauber - Snow Cap
Distress Inks:
Bundled Sage
Forest Moss
Peeled Paint
Vintage Photo
Walnut Stain
FireBrick Red
Jet Black Archival Ink

Thursday, December 2, 2010

12 Tags of Christmas - Day 2

Ok... here goes.  I was able to do the tag earlier than last nite.  My goal is to get each days tag done on the day that Tim Holtz posts it.  So far, 2 days in, and I'm 2 for 2.  LOL!  That's not saying much.  Got 10 more days to go.  We shall see how this goes. 

I had to go to the Aaron's Brothers on the opposite side of town to pick up the Christmas collection set because they ran out at the store closest to me.  So while I was out, I stopped at Michael's and bought the metal tags for todays tag, then made my way home.... stopping at Walmart to pick up my Cricut Lite carts that I ordered on line and had shipped to the store... then it was off to the next Michaels where I picked up the enamel..... ok..... I pass it in my travels home..... and I just couldn't be satisfied til I went to Joann's (needed more paper).  I know , I know... like I really needed that paper.

So without further ado.... Day 2's tag:

Look how pretty it turned out!!

Close up view of the tag.

Close up view of the embossing.

Recipe:
Shipping Tag
Inkadinkadoo Sketchy Flourishes
Hero Arts Pine Cone Stamp
Martha Stewart Acrylic Stamps - Happy Holidays
Stampendous - Music Score Rubber Stamp
Inkssentials Black Enamel Accents
Tim Holtz Adornment Charms - Bird
Tim Holtz Distress Inks:
Stormy Sky
Antique Linen
Walnut Stain
Frayed Burlap
Forest Moss
Peeled Paint
Victorian Velvet
Barn Door
Pumice Stone
Vintage Photo

Wednesday, December 1, 2010

12 Tags of Christmas - Day 1

So I decided to take on Tim Holtz 12 Days of Christmas Tags and see if I can keep up.  Oh Boy!  This is a big undertaking for me.  If you don't know what I'm referring to, go take a look at Tim's Blog and you'll see the insanity in which I speak.    I have a lot of the distress tools needed and am going to try to refrain from buying anything just so that I can put it on these tags.  Wish me luck.

Here's my first tag.  I think it came out rather well with the elements that I chose to use.

At first I was just using the grunge paper, but it was a little thin.... so I switched over to the grunge paper.   I used my Cricut Heritage Cartridge for the house and the fence. 

Here's the completed tag.  I even used music paper like Tim did.  LOL!

A close up view of the fence and my ivy bush.  I thought that was a cute added touch to make it my own.

And a close up view of the top of the tag showing the snow capped roof and windows.

Recipe:
Heritage Cricut Cartridge
Shipping tag
Ribbon from Stash
Distress inks - Black Soot, Walnut Stain, Vintage Photo, Stormy Sky, Tumbled Glass
Tim Holtz Grunge Board - Dots
Tim Holtz Idea-ology Adage Tickets
Tim Holtz White Crackle Paint
Craft White Acrylic Paint
Glimmer Mist - Denin Blue
Martha Stewart White Flocking Powder
Martha Stewart Branch Punch
Glossy Accents


A Holiday Gift Guide

A local scrapbook friend of mine has a neat blog.  Right now, she has lots of giveaways going on.... take a look and sign up for the giveaways.  Got some neat stuff on there.

http://www.thepixelboutique.com/2010/11/2010-holiday-gift-guide-and-giveaways/comment-page-1/#comment-12852

Santa Suit Christmas Cards

I don't know why I do this to myself every year.  Christmas comes around on the same date every year... December 25th.  So why do I wait til the last minute to get my Christmas cards done.  I procrastinate and then I'm rushing trying to get them done and in the mail before Christmas day.  Last year, I didn't make it.   So, I have to laugh at myself, I didn't call them Christmas cards, but holiday cards.  Since the holiday runs through the 1st of the year, I figured if I got them in the mail before January 1st, I was good to go.

I have been scouring the internet and different blogs for inspiration trying to decide if I will make all 80 cards the same or mix them up this year.  So to change things up, I am doing sets of 10 of the same cards.  I only have to come up with 8 different designs.  This is going to be a challenge.

So here is the first set.  There is a site that I go to all the time by a cardmaker named Susie.   I just love her white on white cards.  She has a great gallery of all sorts of inspiration and I love going there for inspiration.  You can check her out at Heart Prints .  I was also perusing Split Coast Stampers for some inspiration.
This is where I came up with this first set of cards that I created.  I think this Santa Suit card is too stinking adorable.

The Silver Buckle was cut at 1.5 inches from the Fabulous Finds Cricut Cartridge.  The White cardstock was cut to length at 7 inches after punching.  The Black cardstock was cut at 1 1/4 inches (width) by 5.5 inches (length).  I used a 7 x 5.5 cardstock base.


Recipe:
Coredinations Glitter Cardstock
Cricut Cartridge - Fabulous Finds (Buckle)
Martha Stewart Deep Edge Linked Border Punch

The inside sentiment reads: Santa Claus has the right idea…visit people once a year!

Tuesday, November 30, 2010

My First Set of Christmas Cards

I am way behind in making my Christmas cards this year.  This is the first batch.  I had 16 to do.  A group that I belong to decided to do a card exchange vs Secret Santa since the economy is so bad.  I don't know what I was thinking when I signed up for this exchange, since I normally do @80 cards to send out each year.  So what was doing another 16 .  Yeah right!

I had another great idea, but it didn't pan out for me.... so I scrapped that and pulled out more paper, punches, and everything else that I could get my hands on.

I'm trying to use up what I have in my stash, but its not working too well because I keep finding that I need this or that.  LOL!  Or maybe its because I just like to shop.
So this is what I came up with for this set.


Recipe:
Plantin School Cricut Cartridge - Noel
MS Punch Rings
Coredinations Red Glitter Cardstock
DCWV White Cardstock
Holiday Inspirations Ribbon - Joanns
Patterned Holly Paper - Heidi Grace 2006

Happy Hanukkah Card Set

I usually try to send out Hanukkah cards to my Jewish friends.  And this year is no different.  I had intended to do another technique, but I couldn't find an element that I needed for the cards... so I switched gears.  I hope my friends like my creativity.


Recipe:
Cricut Cartridge - Joys of the Season (Sentiment and Menorrah)
DCWV Glitter Stack  (Silver and White)
DCWV Shimmer Stack (Blue)
Yellow Stickles (flames)
Ribbon - Holiday Inspirations (Joanns)

Tuesday, November 23, 2010

Sunday, November 21, 2010

More Copic Coloring for the Christmas Season

Tis the Christmas season, so I've been scouring the net for Christmas Digi images that I can use and also practice my Copic coloring.  I want it to look professional.... lol... and not like a grade schooler coloring.  I've got a lot to learn and hope to do so in the upcoming weeks.  I'm doing an online Copic Class over at Simply Scrapping Crafts.

So a while back, I had found this Bratz doll image off of one of those coloring book pages.  I'm not a big fan of the Bratz dolls and their big eyes, but I thought this one was cute.  So I blinged her up a bit.


Recipe:
Ribbon from stash
Copic Inks
Stickles
Image - Bratz Doll from Coloring Book Pages
American Crafts Patterned Paper
Computer Generated Sentiment

Holiday Swap Tags 2010

I've been enjoying doing different swaps over on Scraps of Color website.  We've done different images, cards for all sorts of seasons and now the latest one.... a Holiday Tag Swap.
Earlier this year, someone had hosted an Over The Top tag swap, but I missed out on that and didn't know what was expected for this one.  Upon inquiry, I knew exactly what I wanted to do.   It was going to be complicated since we were going to be making at the maximum 20 tags.  And if you know me, I don't do anything half arsed.

I started searching the net for inspiration and nothing was really talking to me.  Then I remembered the 12 Days of Christmas tags that is done by Tim Holtz  , so I went there for inspiration.
I used one of his ideas from the 2008 tag series.  Its not exactly as his is done.... but I really like the job that I did in creating these.

I pulled out my Cricut Expression.... ok... its always out.... .lol ... and opened up Design Studio to see what kind of Christmas images that I could use for my tags.  I really wanted mine to be over the top and leave a lasting impression.  I used grungeboard to cut out the images and I think I'll be making more to share.  I embossed them and inked them with Glimmer mist for a bit of shine.  The first two that I did.... I used distress ink , but that was taking up too much time.  So out came the glimmer mist.  I really like the way they came out.  I cut a mask for my tags and glimmer misted and dried them.  Then I used distress inks to color them in.  Wow... they are so glimmery shiney.

Then to find the right paper.  I am a paper hoarder and even went as far as going to the craft stores for more paper to use, when I found the right piece in a DCWV Christmas stack.  I computer generated the letters used for the sentiment on the tags, painstakingly cutting them out and inking them.  The hardest thing to find was a flower to match .  Ok.... back to the stores... Michael's nor Joanne's had any Christmas flowers or anything that I wanted to use.  What now?  You would think with my in-house store, that I would have the perfect flower... but noooooooo.  Then I thought , use the glimmer mist.  LOL!  I just love that stuff.

So I sat out to start assembling the tags.  I'm putting them together and oh no... a tag has mysteriously disappeared.  We only had to make 14 tags... and I have 13 .  Now where did that tag go.  Ok... no problem.  Get another blank tag and mask and ink it up.  Easy Peasy.  Hmmmmm..... where did that come from. 

So tags are all assembled and ready to go in the mail tomorrow for the hostess to receive and then divide up to all the participants.  I hope they enjoy my tags as much as I enjoyed making them.

**I wrote earlier that the deer was cut from JOTS .... but after looking again,  I realized I made a mistake.  It was cut from Very Merry Tags and the tag part was 'Hide Contour'd".


Recipe:
Shipping Tags
Cricut Cartridge - Very Merry Tags (Deer)
DCWV Christmas Stack 2010 (Patterned Music Paper)
Computer Generated Letters
Zing Gold Embossing Powder
Tim Holtz Distress Ink - Antique Linen and Forest Moss
Glimmer Mist Colors - Walnut Gold (Tag), Candy Apple Red ( Deer)
Bazzill Flowers - Glimmer Misted with Walnut Gold
Studio 18 Rhinestones
Organdy Ribbon - Michaels

Saturday, November 13, 2010

PLEASE VOTE FOR ALEXSIS!

So while reading my email, I saw this contest for pet pictures.  I entered my sneaky dog.
Please take a moment and vote for her so I can win a new camera and a trip to Aruba.  I really need a vacation right now.
 CLICK HERE..... Petcentric 

Tuesday, November 2, 2010

Related Posts Plugin for WordPress, Blogger...