I Said I Wouldn't Do This!

Ok, I was talked into creating a blog to showcase my creativity. I have been resisting this for far too long, but now is the time to finally get the ball rolling.

So here goes. Come with me on my journey into creativity.

Monday, May 31, 2010

More Copic Coloring and such

I'm having a ball stamping with my new African American lady stamps from Rubbernecker.    Decided to be a bit more productive today and work on some more of my card stash.  I decided not to put any sentiments on the cards, so that I'll have a card blank when I need to ... and I can add the appropriate sentiment later.  So, what I've been doing is putting some matching cardstock with the card inside the envelope for use later on.

Here's the 2 cards I did today before going out:


Ayana


Shenice
(Those rhinestones are actually purple, but they are appearing blue.  I will probably change them out for a different color.)

Recipe:
Rubbernecker Stamps - Ayana, Shenice
Copic inks - for the skin tones, lips
Smooch inks - earrings and necklaces
DCWV Shimmer Stack
DCWV Indian Summer Stack
Rhinestones
Misc ribbon from my stash

Saturday, May 29, 2010

Sketch Challenge with a Twist - Using Red, Black and White Cardstock

Over at the Scraps of Color website, one of the challenges this week was to use Tiare's sketch to create a card using the colors Red, Black and white.  Since I'd just recently gotten in some new African American stamps from Rubbernecker Stamps, I've been testing them out using different coloring and techniques.

I'm still learning to use my Copic inks... and I know I need to add some colors so that I can blend and shade properly... but til then, I'll use what I have.

So this is Breyona again decked out in Black Diamond stickles.  I used a DCWV glitter stack, Red and White Bazzill cardstock, the sentiment is one from SU that I've had for a while, Copic inks, smooch inks, flowers (bridal section from Michael's) and some rhinestones.


Here's a close up view.

Recipe:
Breyona Image (Rubbernecker Stamps)
Marvy Puffy paints
Smooch inks (lips and earrings)
Copic inks (Body, necklace)
Black Diamond Stickles
Rhinestones
White Flowers (Michaels Bridal section)
Bazzil Cardstock (Red and White)
DCWV Glitter Stack (Patterned Papers)
SU Bubble Queen Set (2005)

Friday, May 28, 2010

New African American stamps by Rubbernecker

 I'm so excited.  I got my new African American stamps by Rubbernecker.  They come unmounted, but on a cushioned backing that sticks to my acrylic blocks.  I love em.

I am currently making cards to fill up my stash so that I don't have to rush at the last minute to make one up.  Sometimes I don't add a sentiment so that I can do that when I actually need a card and not necessarily the sentiment that is on it.

Here is the first of four of the new stamps that I just acquired - Breyona.  She's beautiful.  I just love the curls in her hair.

I decided to color her skin tone with my copic pens.  I used Smooch inks for all of the other colors.  I used my Marvy puffy paints in black for her hair.

I backed the image with DCWV Shimmer Stack.  The patterned papers are from SEI Addison.  The border punch used is an EK Success punch - Scrolls and Dots.  Of course, one has to ink the edges and this was done with Tsukineko Memento Dew Drop Dye Ink.    Added a little dotted ribbon and you know, I have to add a little bit of Prima flowers. to offset things with a brad center.


Recipe:
Breyona rubber stamp
Marvy Puffy Paint
Copic Ink
Smooch Inks
Tsuineko Memento Dew Drop Dye Ink
SEI Addison Stack
DCWV Shimmer Stack
Prima flowers
EK Success Scrolls and Dots punch
Ribbon

Saturday, May 22, 2010

Handmade Satin Flowers

While browsing one of my favorite blogs a while back...  Paper Phenomenon ... Kathy Orta had shown some satin flowers that she had made.  They are all over Youtube right now... creating flowers of all sorts .. using various different media.  So I looked through my fabric stash and pulled out some material that I had hidden away.  Decided to try my hand at making some flowers.  They call them "Lollipop" flowers... but I don't know why since they don't look like lollipops to me.  Maybe I'm missing something.  LOL!

This past weekend, I was at my local hangout.... Making Memories Unforgettable ... otherwise known as MMU to us locals.  I bought my little lighter and some material with me and began to show my scrapbook buddy about a new technique in making flowers.  She's pretty much a flower ho and I enable her habits.  I keep a look out for all things flowers for her while out browsing the stores.

There was a little girl there scrapbooking with her mom ... I believe she told me that she was 6 yrs old.  She was working on her own scrapbook page and had all of these flowers that she was putting together in different combinations.  So being me, I went over to see what she was doing and complimented her efforts.

When I was showing how to make the flowers, she came over to my table with her mom to look at what I was doing.  After I finished assembling one of the flowers, I gave it to her for her stash.  She thanked me for it.  Soon after, she was back at my table offering me one of her flowers.  I thought it was sooooo sweet... that I told her we'd just shared our first "swap" together.  She was such a joy.

Well, anyways, here are the flowers that I put together late tonite while watching tv.  I finally found the sixxiz circle die that I wanted since the ones I made over the weekend were free-hand cut.  I'd rather do things the easy way if all possible... and boy was it a breeze to cut them with the die.

Recipe:
Sizzix Circle die
Satin fabric
Fabric Tack Glue
Rhinestones


So, I needed to edit this posting to include a comparison of different ways of making these satin flowers.  The original version, I used a small grill torch (one of those candle torch's that you can use indoors.  Now, I thought there was another version and couldn't find it at the time.  Someone else had experimented and found that if they used a heat gun, they could shrink the satin this way also.  now it takes a little bit longer to do... but the effects are just the same... and the flowers come out a bit tighter.  Elizabeth  from the Cricut Messageboard did a video on how to do this...... go here to view it.

Here's the final product comparison.
On the left are the ones done with a heat gun and on the right are the ones made with fire.


Thursday, May 20, 2010

A Bookmark Swap

I participated in a bookmark swap this month.  Can't wait to get the ones that I'll be receiving from the swap. I actually had a hard time trying to come up with something that was useful and not bulky.  Wouldn't make sense if you couldn't actually use it.

As I was looking thru my paper stash for just the right paper ..... I have so much that they nicknamed me a "paper ho" ... lol.... and I'd have to agree..... I finally found a nice soothing earthtone to go with the sentiment that I selected.

I chose a DCWV Rustic Stack.  I love the earthtones in this stack.  I coordinated it with some Martha Stewart cardstock.  I had gotten it for dirt cheap when it was clearanced to $4 for this huge stack.  The MS Cardstock was cut at 7.5 x 2.5 inches.  I cut the patterned paper .25" shorter than the cardstock for layering.

I stamped the sentiment on the lighter colored patterned paper with pigment ink and embossed it so that it would stand out.  The complimenting patterned paper that I used for the reverse side had scrolls and flowers on it.  So I got this brilliant idea to use my crystal glaze on it... but that was going to take too long.  So I pulled out my embossing pen and went over the areas that I wanted to emboss... and wow... everything just popped out.

A few years back, a friend became a CTMH consultant and one of the initial workshops she did was on creating a bookmark.  I called her up to see if she had any of the bookmark holders left since she's no longer selling CTMH products.  Lo and behold, she had some... so that saved me from having to use my zyron laminator.

I got everything assembled and thought it still looked too plain.  What can I do to make these bookmark pops, but not be too bulky?  Flowers.... Prisma flowers and Rhinestones.  Everything... ok... most things have to have a little bling.

I hope the recipients like the bookmarks that I lovingly created.

Here's all of them together:


Here's a view of just one of them:

Here's the backside of them.  Hope you can see the embossing that was done to the scrolls:


And here's a close up view of the sentiment and the embossing:


Recipe:
DCWV Rustic Stack
Martha Stewart Cardstock
Sentiment : Cloud 9 Design Baby Girl
Prima Flowers
Rhinestones
Tsuineiko Chalk Ink
CTMH Plastic Bookmark Sleeve
Utee Embossing Powder

Wednesday, May 19, 2010

Meet The F.R.E.D. giveaway

Ok... here's your chance to win a FRED.
Just go to my friends website and make a comment, twitter or suscribe to her blog .
I think this will be a neat thing to have in my scrapbooking room.

Meet-the-f-r-e-d-giveaway/

Monday, May 17, 2010

I won! I won! I won!

I finally won something.  LOL!  See how excited I am!
At the scrapbook group that I belong to, one of the scrapbookers has this awesome blog in which she tests out different things and gives them away if you tweet or blog about her post.  So, I keep going out to see what she's up to and what she has to give away each month.  This past month, she posted about this laser trimmer... so I tweeted and then life got hectic.  Didn't tweet as much as I had planned to , but nonetheless... I won!  On Friday nite, she brings it in for me.  She's given away a Gypsy handheld device and a Wacom notepad as some examples.

So, go take a look at her blog and support her efforts .

Here is my prize:

I can't wait to play with it this week.

Sunday, May 16, 2010

Mesa, AZ CKC 2010

I'm finally getting the chance to do the layout of my scrapbook weekend for the Mesa, AZ CKC convention 2010.  This year, I took a card class with friends and we had a ball.  It was fast moving.... blink and you'll miss something.  LOL!

This year, I had been talking to another scrapbooker that I met from the Cricut Messageboard.  We'd been trying to connect... but there is about a 2+ hr (more like 3 hr) drive from our respective homes.  I told her that I was going to the convention and taking a class with some friends and got her to take the same class.  We'd been talking via phone, emailing and all about all sorts of things, so this was a good time to finally get together and do something fun.

So here we are just as the class ended.  Got one of the class assistants to take our picture while we were all together.  I'm going to a retreat at the end of the summer and hoping that she'll be able to come this way so we can really have a scrapping weekend.


Recipe:
Making Memories Fresh Anthology Collection Cardstock (2007)
Coredinations Gemstone Cardstock (white and blue)
Cricut Base Camp Cartridge
White Signo Pen

Saturday, May 15, 2010

Blog Candy and a Fantastic Blog

I was browsing today and stumbled upon this blog.  You've got to go look at all of the inspiration.
Charmedcrafts

Thursday, May 6, 2010

Graduation Gift

A very good friend's daughter asked me to do a special request and personalize some martini glasses for 2 friends of hers that will be graduating this weekend from the University of Arizona.  I tried finding the big ones, but had no luck in finding them.... so I settled for the regular martini glasses.  I hope they like them.

I used the SCAL program for the graphics and also for the name.  Since it was for a female, I wanted the writing to be on the feminine side and found a curly type font and italicized the names.  I think they came out quite well and everyone should be pleased.


Sunday, May 2, 2010

National Scrapbook Day

May 1st was National Scrapbook Day.   A scrapbook group that I belong to has an annual scrapbook day Fiesta to coincide with this day devoted to all of us die-hard scrapbookers.  The event lasted 12 hrs.  It's a "Themed" scrapbook event and everyone really goes all out for it.  This was my first year attending since the last 2 years, something prevented me from going.  I begged, cried and stomped my feet to get into this years event ... and I'm glad that I did.  My groups table was Snow White and the Seven Dwarfs.  I played "Sleepy" and got to wear my scrapbook pajamas.    Someone made hats and slippers so that we could all be coordinated.  I can't wait to see all of the pictures and scrap the day.

There were lots of raffles and door prizes, prizes for best table, best costume.... the list just went on and on and on.  Unfortunately, I didn't win a personal prize.... but there is always next year.

I did more eating and talking, socializing with others and peeking to see what everyone else was working on, that I only got 1 layout done and 2 mini calendars.  But its ok.  I came home and worked on another online challenge - a Mother's Day Card.

So, here is the 2-page Layout that I completed minus the pictures.  I was having too much fun that I didn't dare leave and miss anything to travel 1 mile to pick up my pictures.  So, I'll have to add the pictures later on.
I did a Breast Cancer layout to go with the pictures that I took when I walked the local Susan G Komen Race for the Cure a few weeks ago.  I used my Cricut Pink Journey Solutions Cartridge .


Here are close up views of the words:


Then I attempted to do some hanging wall Calendars.  I gave one away to one of the ladies in my group.  I hope she likes it.  This wasn't my idea, but one that I found on the Cricut Messageboard .  One of the members on there by the name of Greenbean .  These boards are metal and made from "roofing shingles/flashing".  I get the strangest looks sometimes when I go to the hardware store and ask for certain items.


And last but not least, here is the Mother's Card that I did for a challenge on another messageboard that I'm a member of called Scraps of Color .  In this challenge, you were to use 2 stamps, lots of layering, at least 2 types of embellishments, and embossing.  I think I covered everything.


Sunday, April 25, 2010

Do you like Desserts?

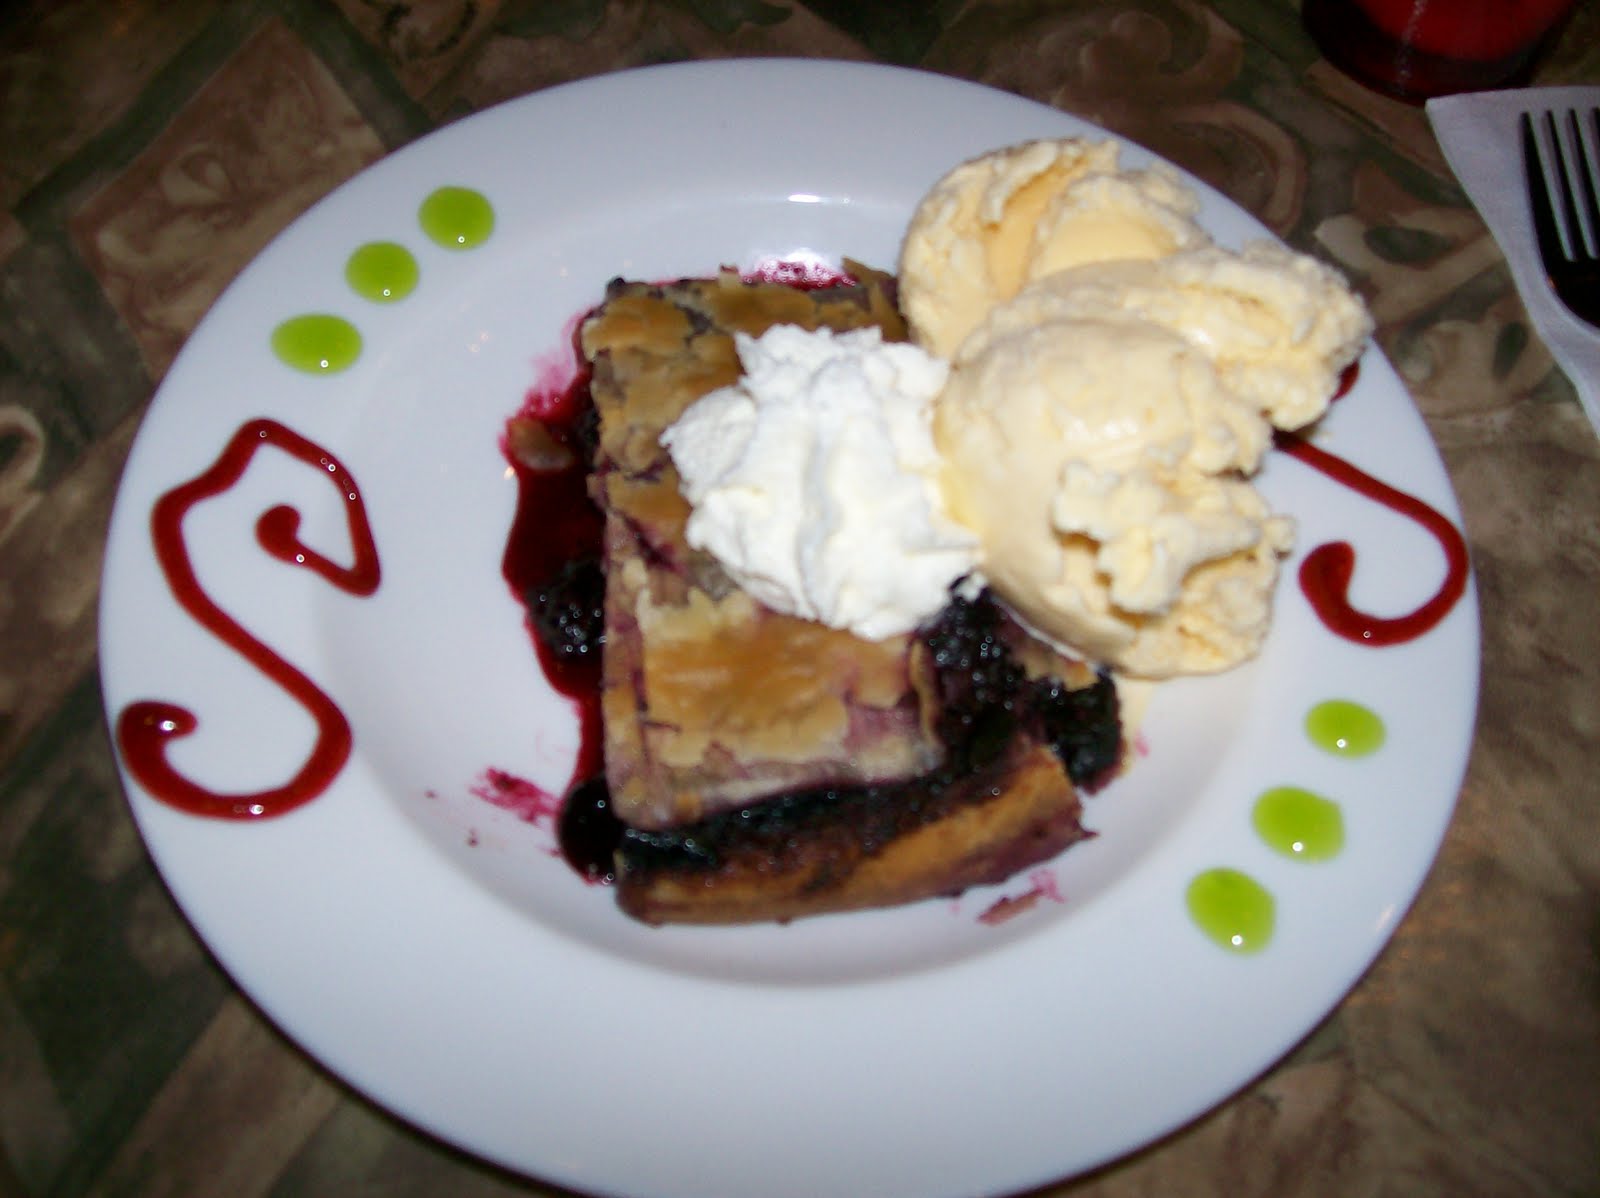
Tonite, I met with a group of friends from my scrapbook group to do a circle journal exchange.   This was our final exchange in which we get back our own personal journals and have a chance to look at everyone else's completed journals.  There were 7 of us in this group, so we met at a place that I'd not been to before for dessert called "Something Sweet".  Boy.... were the deserts humongous... but oh so good.  I am stuffed.  I had the Blueberry Cobbler with Vanilla Ice Cream.  I am definitely going to have to take a walk tomorrow to burn off some of these calories.


Doesn't this look so inviting?

Happy Birthday Card using Forever Young

It's been a busy week for me and I didn't get a chance to get much crafting done, although I have all sorts of ideas floating around in my head waiting to get done.  I'm hoping to get things done this week that I had to put off last week.

Today, was a friends daughter's birthday.... so I made her a card using the Cricut Forever Young Cartridge.  I found some pretty Basic Gray double-sided paper at the LSS and went to work.

I cut Model 14 out at 4.5" , shadow cut and layered with Coredinations paper. Used some ribbon, rhinstones and Prima flower for accents.  The sentiment was cut from the Cricut Beyond Birthdays Cartridge at 1 1/4"  and layered.
I inked the edges with Tsunieko chalk inks.


Recipe:
Prima Flowers
Rhinestones
Ribbon
Basic Gray Patterned paper
Coredinations Gemstone Cardstock
Tsunieko Chalk Ink

Monday, April 19, 2010

Give a Hoot

Provocraft is coming out with so many new cartridges, that I can't keep up with them.  A recent treat on a new cartridge brought me Give a Hoot .  The owl on it is too cute... along with the other shapes.  I'm a bit behind this past week in creating things and managed to find the time to put this one together.   I can't wait to make more from this cartridge.  It has lots of potential.

The card was cut at 7" x 5" and layered with brown, cream, rust and a pale orange of Bazzill Papers.  The pattern paper was American Crafts.   The ribbon was from my stash.  The Owl was layered and cut out at 3 inches.  I pop dotted the words and the owl off the card.  I used Cricut Makin' the Grade Cartridge for the words, which I welded the shadow layer of the words and cut at 1".


Recipe:
American Crafts Patterned Paper
Bazzill cardstock
Ribbon
Pop Dots

Monday, April 12, 2010

Mother's Day is Coming Up Soon

I'm trying to keep ahead of the game by knowing what I need to get done for upcoming holidays and special events.  The next big event is Mother's Day.  Since I've not done any etching in a while, I decided to do a Mother's Day plate for my mom.  Although she's considered legally blind, she appreciates things like this that she can show to her friends when they come over.  You know how mom's need to do a bit of bragging.

Today, I pulled out the vinyl and the etching cream and went to work.  After playing around in design studio, I found a border that I liked well enough to etch.  I used the Cricut Joys of the Season Cartridge for the border, the Mother's Day Seasonal Cartridge  for the words and Cricut Calligraphy Collection Cartridge for the date.  I think it came out quite well.

So it started off with the vinyl looking like this:


To adding the etching cream and looking like this:


And turning it into this:


Recipe:
Vinyl
Etching Cream
Cricut Cartridge - Joys of the Season
Cricut Cartridge - Calligraphy Collection
Cricut Cartridge - Mother's Day Seasonal

Susan G Komen Race for the Cure

Yesterday here in Tucson was the local Susan G Komen Race for the Cure.  For the past 2 yrs, I have volunteered with this magnificent organization.   My mom is a Breast Cancer Survivor of 10 years, so this is very close and dear to my heart.

This past year, my bowling teammate and good friend, was diagnosed with Breast Cancer.  She found the lump herself.  She has undergone chemotherapy which has done some horrible things to her body .... loss of hair, fingernails that are popping off, swelling of the lymphatic system , and the list goes on.  This past Friday, she finished her last does of Radiation treatment.  Almost her entire family and friends .... me included .... walked with her in this fight against Breast Cancer.   I have done the Susan G Komen Breast Cancer 3-day twice in the past (2007 and 2008) and I'm hoping to do it again this year seeing that I wasn't able to walk it last year.  It is 60 miles in 3 days... and yes, this body has done it twice.  It is the most emotional event that I have ever done and hope to do many times over.

So walking yesterday was an event in itself.  I set both of the alarms on my clock so I could get up in time and get to my friends home.  5am and 5:30 am.  ...... and you guessed it... I didn't hear either one of the alarms at all.  I awoke around 3:30 am and went back to sleep... so I must have been sleeping really hard.  I awoke suddenly ... looked at my clock and saw it was 6:30.  The race starts at 8am.  But that meant I needed to shower and dress and get to the shuttle parking lot , so I could get to the event and register.  I know, I know, I know... I should have registered long time ago... but I procrastinated.  But I made it with minutes to spare.  I had laid my clothes out before I went to bed... but I awoke to finding only one sock.  I know Alexsis nabbed it while I was sleeping.  BAD Dog!!!

I don't know what the final head count was of all of those walking yesterday, but its a sight to see.  If you've not done one before, I urge you to do so.  My friends hubby has not walked in a long time.  Although we all started off as a family and group, Vickie needed to walk a bit faster so that she could make it to the end of the 5K race.  I lagged behind with Dave to make sure that he did make it with no problems.  I'm a proud member of the "no one left behind club".  He made it to the end (3.1 miles is a long walk for someone that doesn't walk at all) and has vowed to continue to walk to get back into shape.


Saturday, April 10, 2010

I'm Beary Sorry

I had decided to take some lessons on coloring with Copics.   I had stumbled upon this blog called Simply Scrapping.  You can find it here.  Since I've invested a lot of money in these, I need to start using them.  Instead of doing my laundry... I'm sitting here coloring.  How much fun is this!!!

I'm behind in getting started with the tutorials since they are now on lesson 5 ... and I'm just doing lesson 1..  Time does seem to fly when you're busy doing other things.
I have lots to learn, but I'll get there.

So, I printed off the image that was given for the first class.  I was able to find 3 colors that were 2 degrees away from each other and went to work.  This lesson was on blending and I've got some practicing to do.  But for a first time in using them this way, I don't think I did a bad job.  Ok... who am I fooling.  LOL!

Turned it into a card.  Cut the bear out and pop-dotted it onto another image.


Recipe:
Copic Sketch markers E55, E57 and E59
Rhinestones
DCWV Indian Summer stack
GP Cardstock 110 lb wt.
Wrights Prestige Ribbon

Thursday, April 8, 2010

What is Red Velvet and Silver and You've Got to have it?

Theres some wonderful things going on the Cuttlebug Challenge blogspot.  Go on over to the Cuttlebug Challenge and enter to win a Cricut Cake and othe prizes.

http://cuttlebugchallenge.blogspot.com/2010/04/what-is-red-velvet-and-silver-and-youve.html

A Card to Celebrate


I pulled out some of my favorite rubber stamps today and decided to make a card.  Its for no one in particular, just rev'ing up my card stash.

I've had this stamp for a while and I can't tell you where I got it from, but I believe it was from one of the stamping expos that I went to a few years back.  I wish that vendor would come back so I can get more of these stamps.

I used the Gemstone cardstock from Joann's, some sheer ribbon that I had on hand and colored the image with my pearlescent inks.  I used the Marvy liquid Applique on the hair.  I cut the image out and pop-dotted it ontop of another image.


Recipe:
Rhinestones
Sheer Ribbon
Black Liquid Applique
Studio G Stamp - Celebrate, Series 46
Gemstones cardstock
Gold Lame' Smooch ink
Pearlescent Inks: Silver Moss, Sundown Magenta,, Waterfall Green


Tuesday, April 6, 2010

A Recipe Book ala Kathy Orta Style

While searching some of my favorite blogs today, I stumbled upon another fine tutorial and videos by Kathy Orta of Paperphenomenon .  She does some great stuff and I draw inspiration from her all the time.  She's been showing how to do mini books of all sorts and I've been intrigued and bitten to do a few.

A few days ago, she did this Cupcake box .   Please check out her blog for detailed instructions and dimensions necessary to make one of your own.  So tonite, I sat down, pulled out my chipboard, some colorful papers and went to work.

I had bought some 12" x 24" from my local hangout, Michael's, a while back.    It's a designer paperpad by K&Company.  It has a glossy finish to it.  I originally bought it so that I can make some larger purses using my Cricut machine, but hadn't gotten around to it.  While watching the video, Kathy pieced together 2 pieces of paper so she'd have the correct length for this box.  But since I had this paper on hand, I decided to give it a go.

I embellished the book with a layered flowered that I cut with my cricut using Plantin Schoolbook.  I used a Velcro Hook and Loop circle and adhered it to the flap for closure.


I then made my own recipe cards to go in the envelopes.  I hand drew the lines on the back of the cardstock and added matching tags.

Here is the box opened with the cards sticking out.


Recipe:
K & Company 12" x 24" Paper Pad
Chipboard
Envelopes from Michaels
Tacky Tape
Scotch Quik-dry Adhesive
Plantin Schoolbook for the flower
Bazzill cardstock for the recipe cards
Miscellaneous Rhinestone (from my stash)
Velcro Hook and Loop Circles
Related Posts Plugin for WordPress, Blogger...